
4H Chart
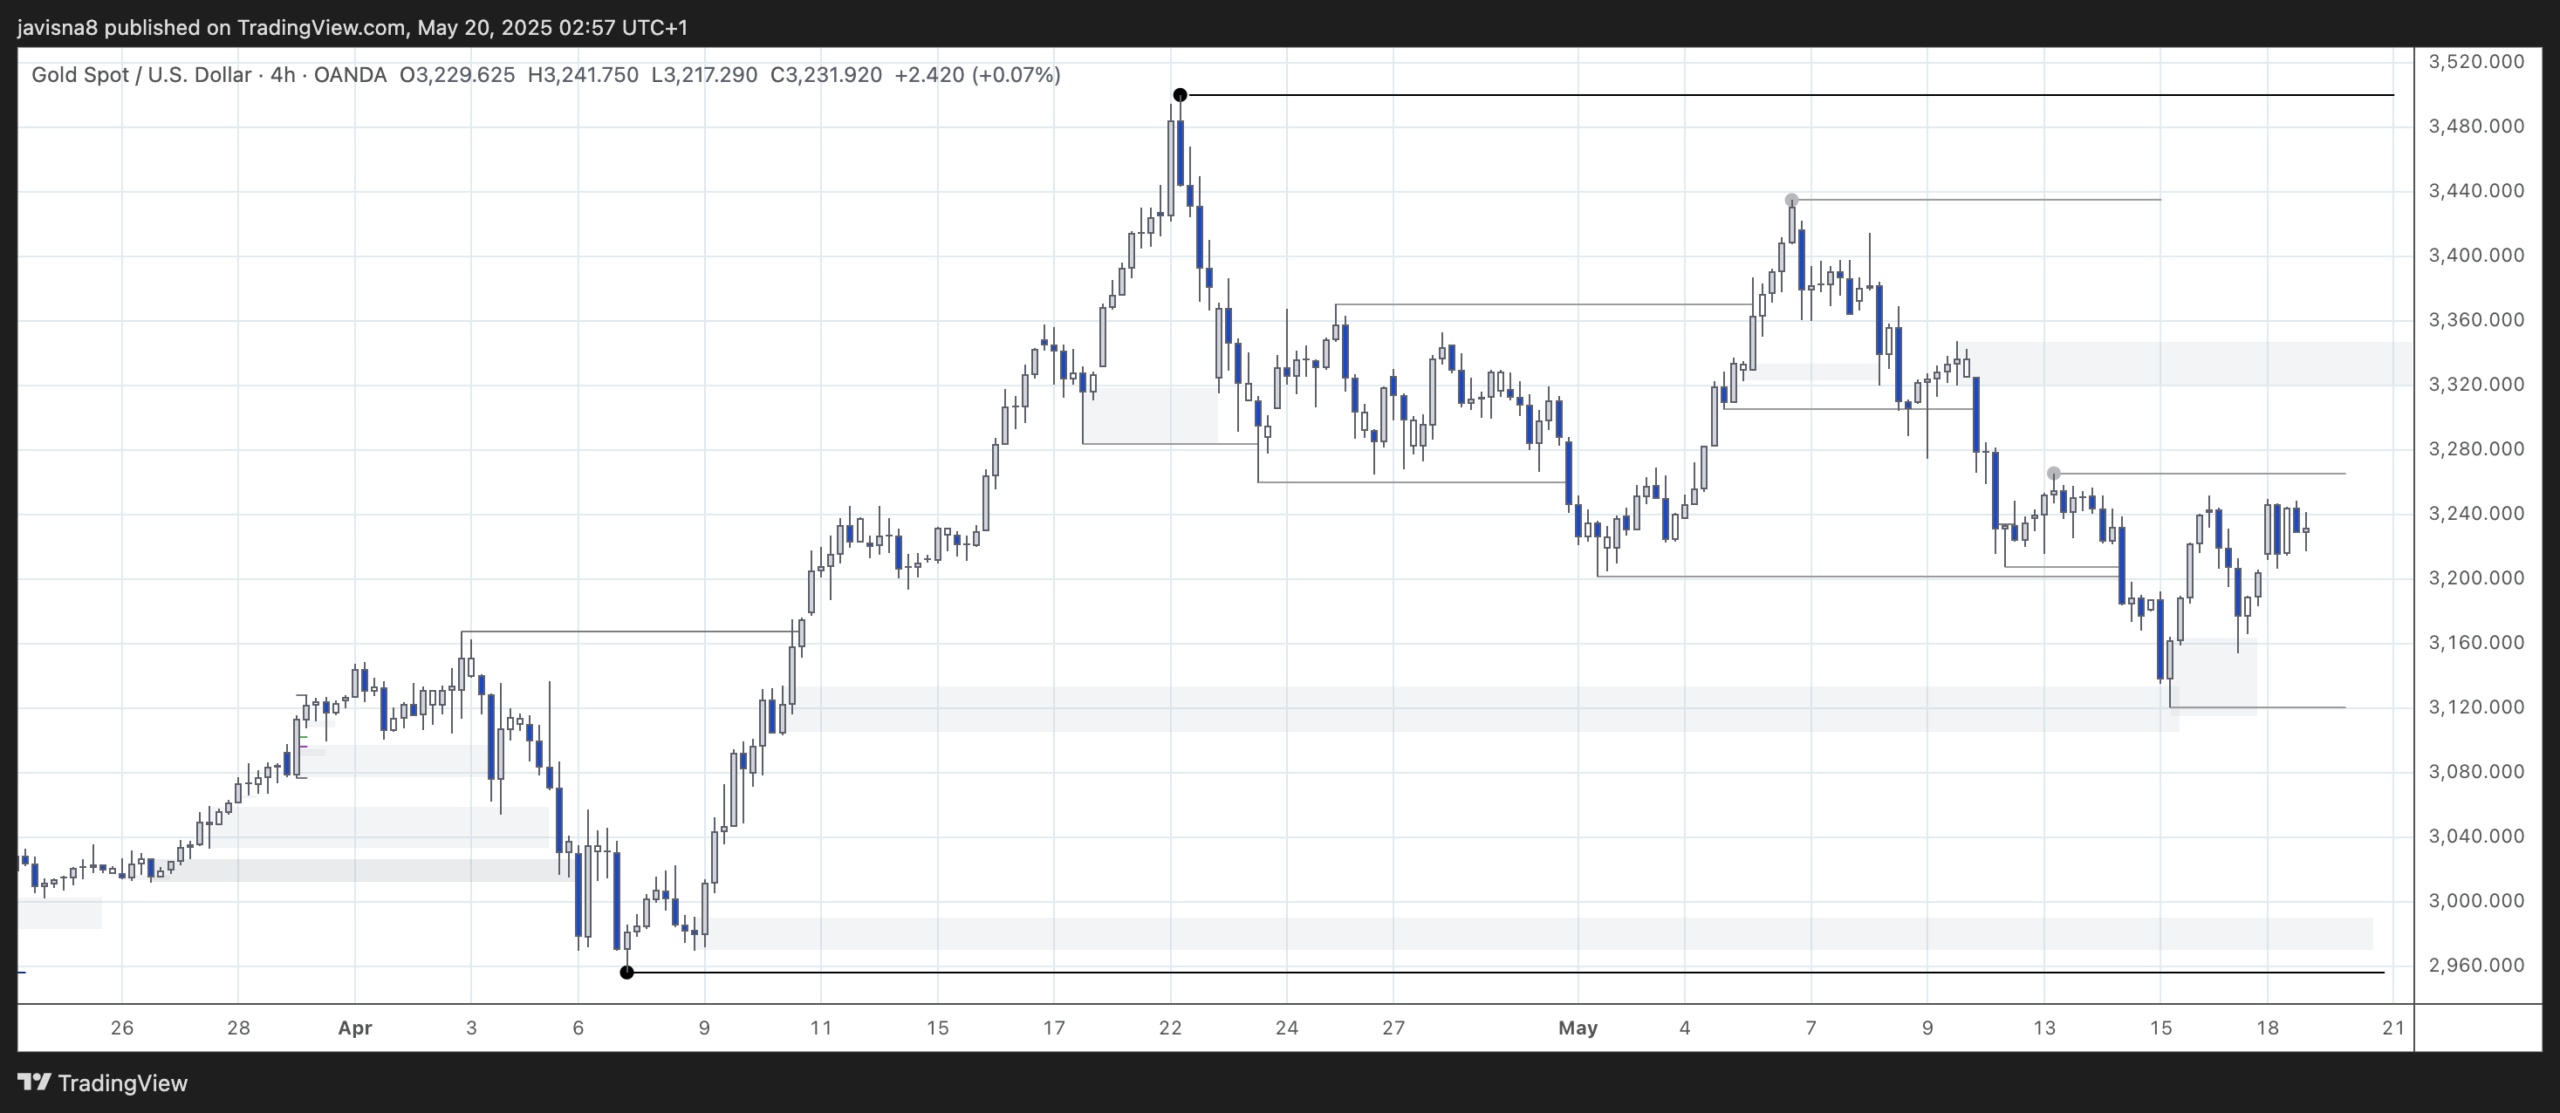
4H swing is bullish. Internal is bearish. The internal can be considered bullish already if that small consolidation (three candles) before the low at 3,120 is counted like an internal break. In the way I map structure, I consider that more like a change of character (CHoCH) but my internal BoS is kept above.
After mitigating a strong 4H demand area, price started to form bullish structure leaving a new 4H demand area (not very strong as only cause a minor break). This new PoI held and currently price is trying to take an internal weak high but struggling. Price is accumulating near the top which could indicate a potential break up.
15m Chart
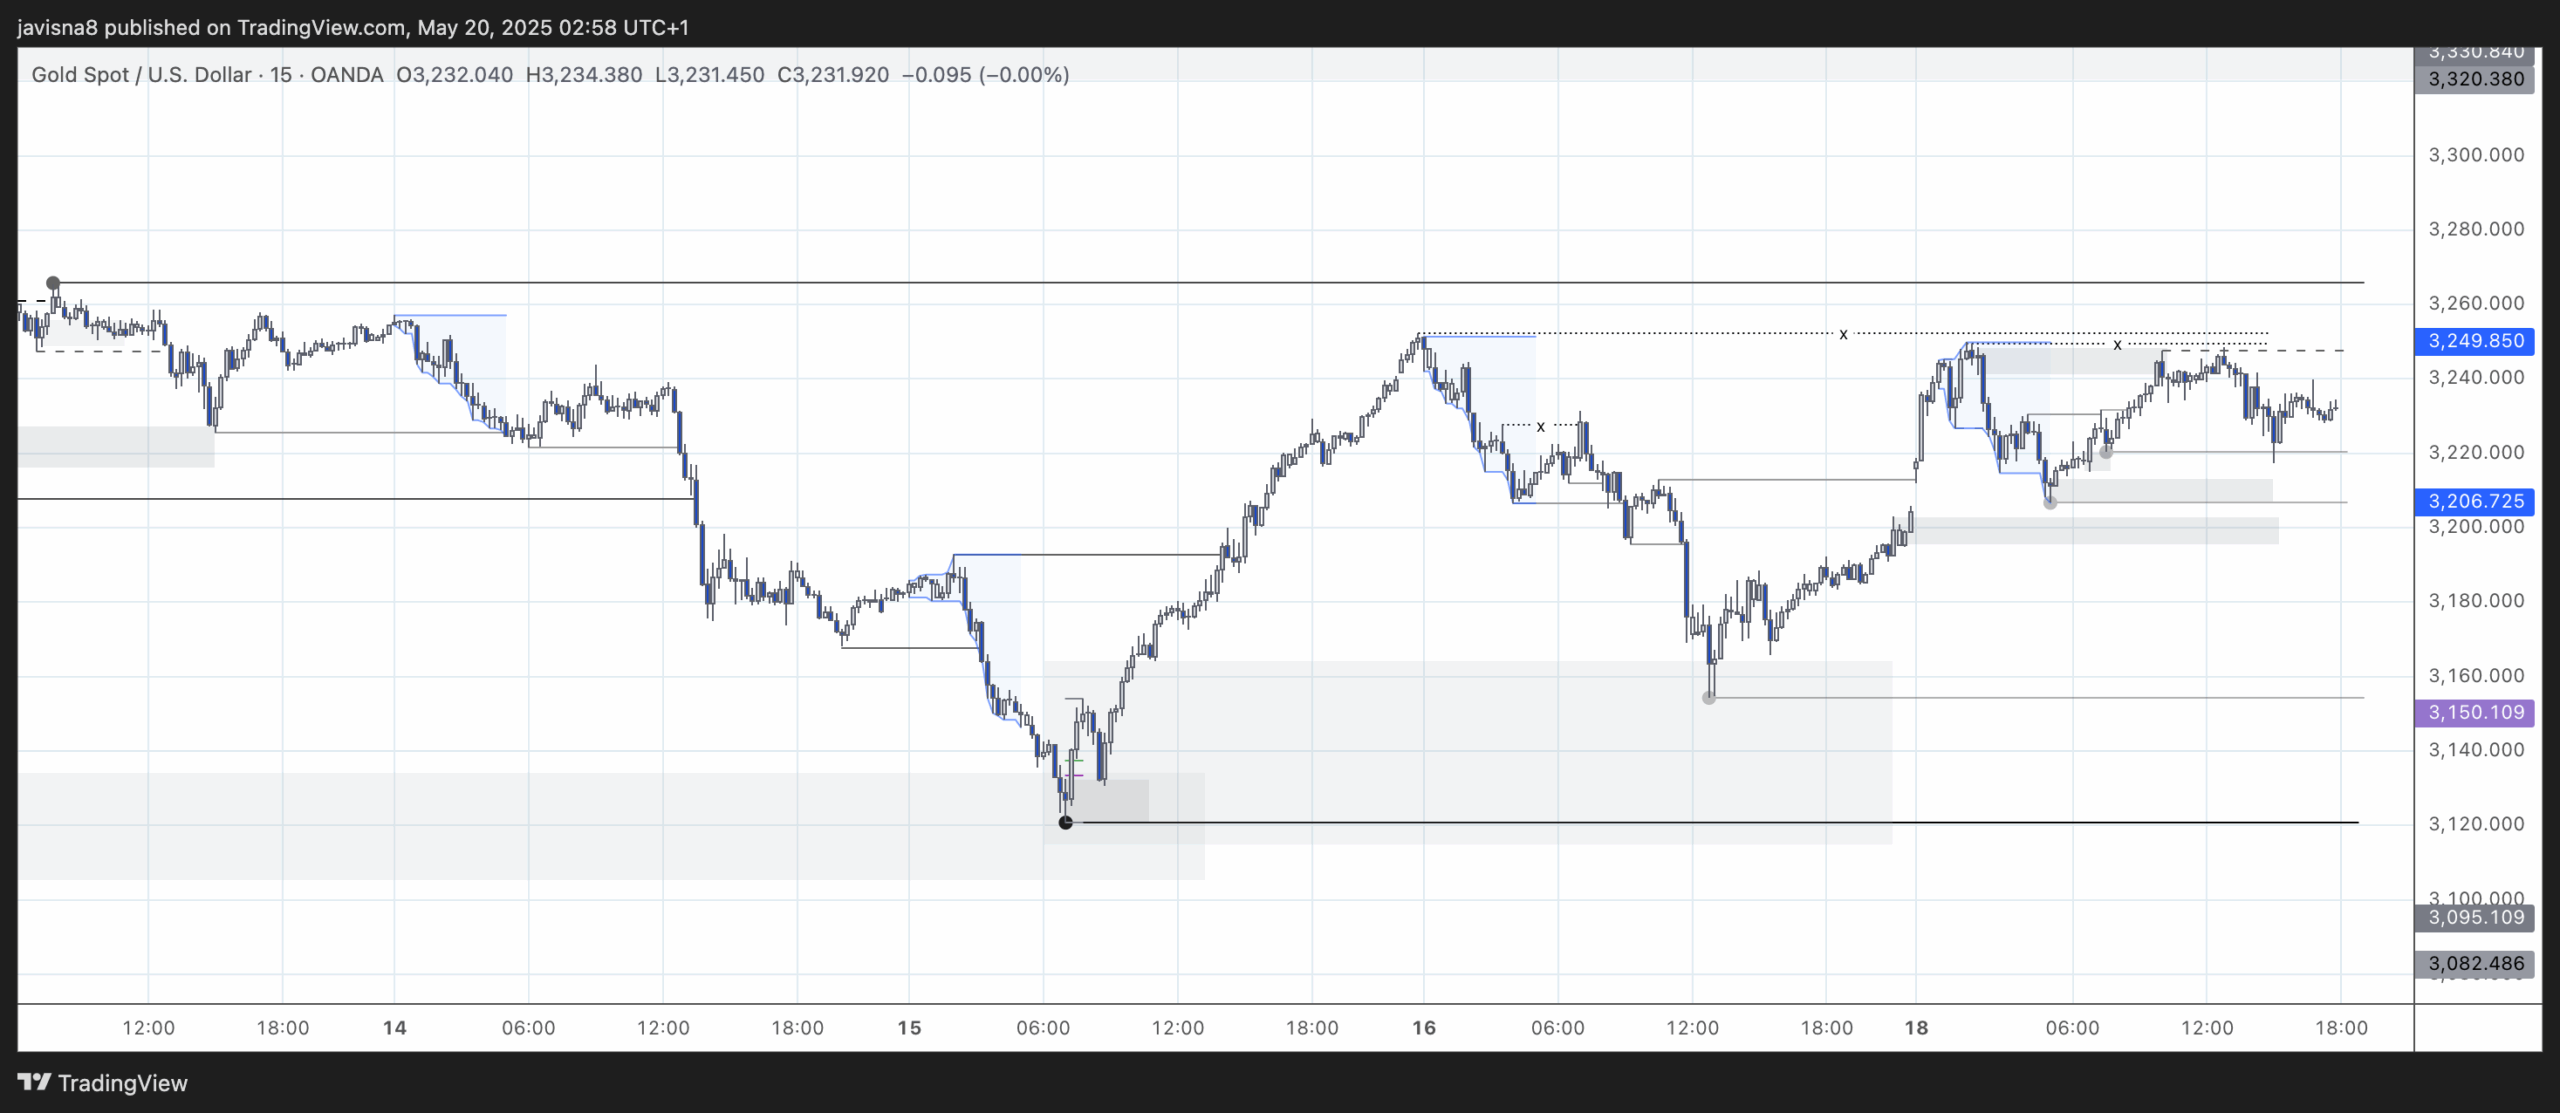
15m swing is bearish. Internal is bullish.
After pulling back to the new 4H demand area price started moving up again towards the weak low but failed. A lot of liquidity is accumulating over a few highs printed in last 2-3 sessions.
Although there is a strong 15m high around 3,265, price has mitigated a strong 4H demand area (14th of May) which means that the 4H bullish trend might resume. 4H timeframe is stronger than 15m timeframe so I expect the strong 15m high to be taken.
Session Outlook and Entries
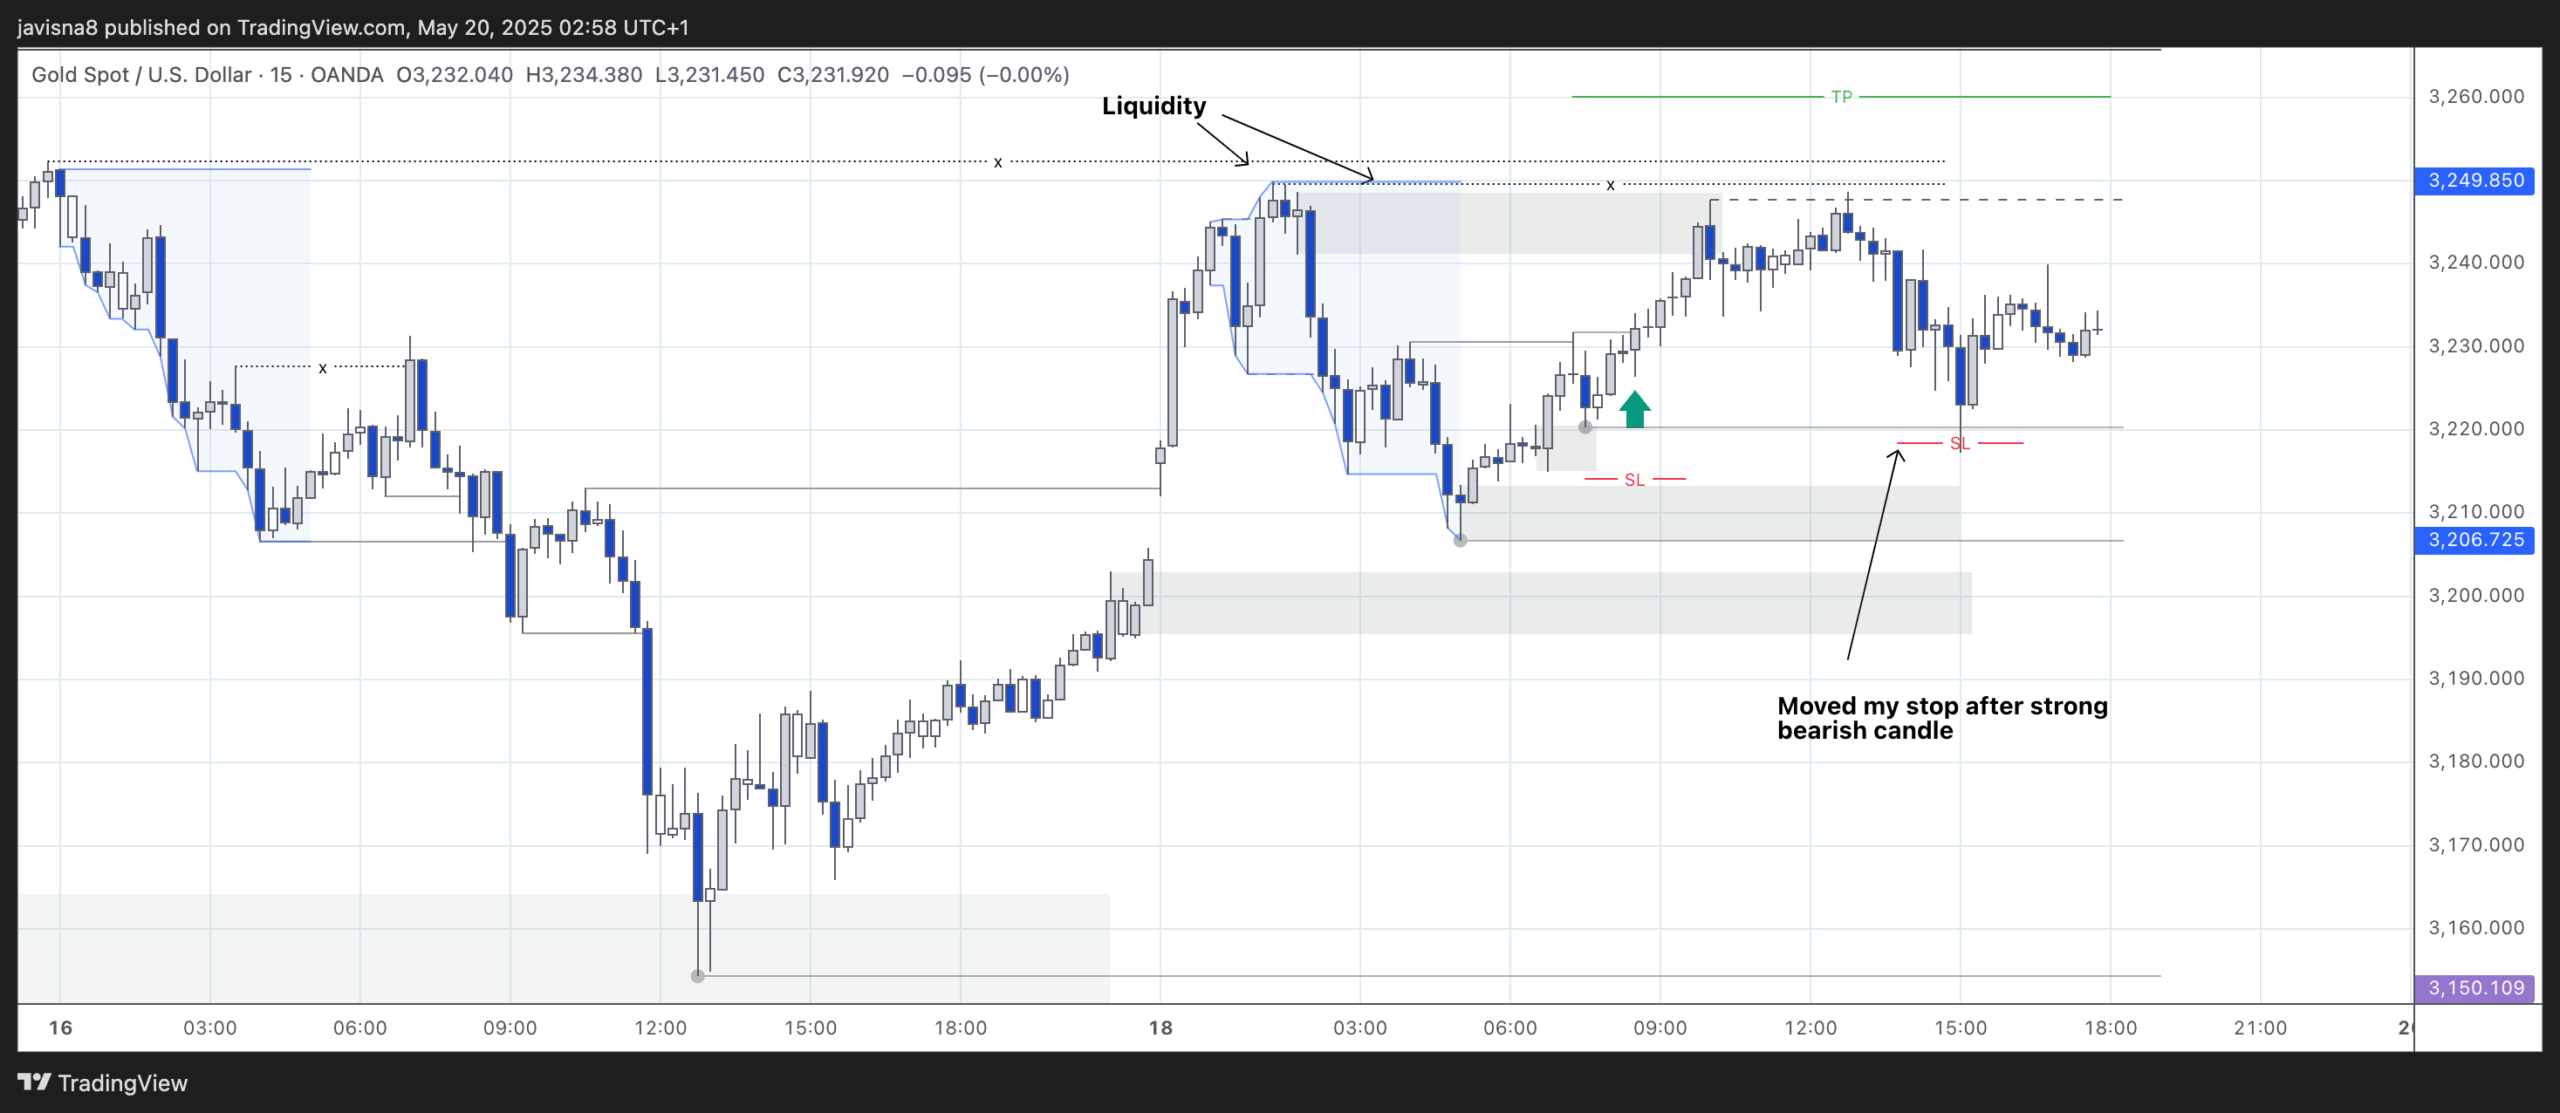
Bias for the session is bullish, aiming to take the weak internal high with all the liquidity resting above and, potentially, the strong 15m high (black line coming at the top).
Just towards the end of Asia session, price pulled back to the Monday opening gap. Price took an internal high around London opening time but it was only a wick break, I wanted to see a body break just in case price decided to mitigate the PoI below the opening gap with one more bearish internal leg.
I entered on the break of that wick (green candle). Even though there was a PoI just on top, considering the liquidity resting above I was expecting it to fail so I could go for a 1.7 R:R. Price did not manage to take the high and printed a strong bearish candle. I decided to move my stop in case of a continuation of the 15min swing structure (remember that we are close to the strong high). I was taken out with a small loss.
Final Thoughts
- It is always wise to aim for the weak structure and take some profits there. In this case there was not enough room for me, maybe just a 1 to 1 R:R.
- My experience moving stop losses has not been good. Normally, I am taken out and price continues in the direction of my trade. Unless structure confirms the change in OF (order flow), I rather not move it. In this case, there was a small BoS so structure was starting to be bearish.
- Was there a trade for me in this case? I follow SMC trying to trade only from strong PoIs. I am experimenting too with order flow change entries. Overall, I think the set up was ok, a bit better entry would have been on the mitigation of the PoI that cause the wick break just before my entry.